Showing posts with label dynamic. Show all posts

Jun 6, 2014

Water Legs - Photo Manipulation

I've done something out of the norm again!
I got this idea to replace my legs, with falling water onto my shoes.
It really wasn't easy to shoot, but it was fun.
 
Of course, the first thing of any photo shoot is the setup. I mean, focus, position and of course, a proper frame or composition. Remember to shoot a little wider so there's space to crop. It's a real bugger to try and add to a shot afterwards. For this experiment, I used my back yard, well, actually my landlord's back yard. My spot had great light bouncing off the wall behind the camera, allowing me to be in the shadow of a tree, while still getting enough light on me as I posed repetitively until I had a shot I could use (shot about 5 shots in total).
 
I don't have fancy gear, I don't. This was shot with my Sony SLT-A35 and my kit 18-55mm lens set to around 18mm.


Now once I had a pose that would work, the pouring could begin. 8 or 9 shots (and a wet pair of denims and especially the shoes) later, I had two images I could potentially use to mask over my legs.
 
Here's me now finally getting the left "leg" close enough.

 
Then the right leg.
Each time I would have to walk to the camera, check the shot and try again. The tap I was using was also a walk away, so the bucket constantly needed filling too. Remember, I don't have a remote shutter or anything, so each shot was set with the camera's 10 second timer. In which case I would be running up and down between shots.

 
Problems will arise if your planning is not 100% spot-on. Here I was using a square bucket, because it gave me great walls of falling water. Thing is, somewhere along the line, I got must have bumped the shoes, or the camera just slightly, so the alignment wasn't accurate. Also, the water angle wasn't right. But it's cool, I have Photoshop CS5.
 
When I was masking the water over my legs, I had to adjust the correct them. For this I used my select too, pressed ctrl+T to select the distort option. This helped, but not enough. I then used the rectangle marquee tool to select the parts I needed and ctrl+J to duplicate these. Again, the select tool and, again, the distort function to try align it more. the I used the warp tool (right-click select warp) to bend the shoes back into place and align things properly. Then I added mask layers to the water and blended them in properly. Once I had them all aligned and blended, I cropped the image a bit. I then created a merged image from the layers (ctrl-clicking on merge layers will create a merged layer without losing your previous layers).
 
I then played a little further using Shadow/Highlights and a soft-light B&W layer blended over that to bring back some depth and detail. The result is what you see below. :)

 
Remember, If you want more details, or to book me for a unique and creative shoot, drop me a >mail< and I will pencil you in. All images are the intellectual property of Collin Scott Photography, all rights reserved (C) 2014.
 
If you do share, please remember to respect the creator and to mention them in your post.
 
Thank you, have a great day!


Jan 25, 2013

Flying Apple Slices!

Hey guys!
Been a while and I have had such a major mental block, it wasn't even funny!
 
In October 2012, I took my camera and started to play again... this time, getting tricky!
All the searching for cool ideas led me to try some wayward thinking.
 
In this case, flying apple slices and chunks errupting from the apple.
 
right, if you never knew how to... you do now.
 
I got me some really big, juicy, crisp apples and instead of just eating them, I first played with them. Yes, I played with my food.
Look below... looks cool, doesn't it?


How?

Easy!
 
First thing to do is... slice your apple, or any other fruit you desire...
Second thing, prop the peices into place with either toothpics, kebab sticks or, in this case, match sticks.
 
Position your uh, model... point your camera at it and shoot!
Okay...
Once you have your photo, it's time to take it into your editor... mine is Photoshop CS5. But, any editor with clone and heal features will do the trick.
Simple!
See the original photo?
 
 
Cool hey?
With a lot of cloning, recloning, close-up cloning and same amount of healing, you can get a good result. All it takes is time and a little patience. Be a perfectionist if you must!
 
Remember, to make it believeable, you need to really treat it well. Take care to notice edges, marks etc that may catch the alert eye.
 
Okay, I did do some of my usual layering afterwards and some minor cropping just to make it seem a little more appealing, especially since I underexposed a little and shot a little wide.
 
Below is another one I did, then ate. If you look close, you can see the attention to detail, it seems really as if the apple bits are floating.
 
Now, don't forget, you do not need major editing skills or any fancy schmancy equipment. This can be achieved similarly, with a cell phone, or basic pocket camera too!
 
If your camera has the ability to do long exposures, you can also have fun that way.
Here, I set up my Sony A200 with my tripod. I switched to manual mode, set the shutter to 30 seconds and set the Aperture to F8 with the ISO at 100.
I have a great little light on my cell phone, so I danced around in the street. Okay, not exactly the street, the end of a road. It took a few attempts to get the manual focus right, but nailed it nicely with this one! My mistake, wearing shorts. So, my multiple legs are noticeable in this one... I was also blessed with a car passing by in the background too!
 
 
Anyway, thanks for popping by.
 
Go play outside!
 
See you soon!
 
If you've played like this, would be nice to hear about it, share a link in the comment box.
 
Take care
Collin.

Oct 12, 2012

Special Effects

Hey everybody!
 
So, I've been asked numerous times on how I get this effect. Well, I was inspired by a technique called the "Dragon Effect" as the linked video will show you. This, is my own variation of this "effect". It's still a bit of work, just like most of the youtube clips will explain to you.
 
Me, I think I've followed most of the steps, but, still doing it my way... I guess I have this thing about following rules... I use them as a guide.
Two more examples at the end of my story.
 
Your initial image should at least look good to start with. This example taken in the middle of the day is a good platform to work with, but not exactly the best.
 
Time to start putting this onion together, one layer at a time.
 
This guy was neglected by his decade long employers and left behind in a small town that is also neglected.
Please note that I do all of this in the fantastic Photoshop CS5 and hope you will understand my tutorial here as I don't go into details. I don't show clips of settings, screen dumps or any of those that you see in other tutorials. I just tell you what I did and how I did it. I will however try to give you as much detail as I can remember.
(I'm glad I saved the .psd file so that I could dismantle it and give a brief on how-in-the-hell I did this.)
 
Right, first thing I did was to shift the shadow/highlights drastically.
(Image -> Asjustments -> Shadow/Highlights)
By shifting these sliders, you can tweak the levels until you find yorself with quite a nice balance between lifted shadows and darkened highlights.
 
 
Then a quick copy of the layer (Ctrl -J Win/Cmnd J Mac), which gets some Gaussian Blur thrown at it (Filter -> Blur -> Gaussian Blur). This is to wipe out any freaky looking ghosting and edge halo's that are caused by the shadow/highlight procedure. There are other ways, but this is what I did. Oh yes, don't forget to now ERASE the subject so that only the background is blurred (this can be achieved in various ways, such as using quick select too, magnetic lasso, or just erasing). I used a combo of quick select and eraser.
 
 
 Ok, cool... So you've noticed a MAJOR saturation explosion, don't worry, we'll get to that. Before that (and this is why I'm not phased by the saturation) I add yet another layer. This layer gets desaturated (Ctrl+shift+U), then more shadow/highlights, then contrasted and finally, the layer filter is set to "Soft Light". Don't really notice it below? Probably because I shifted the fill and opacity just a tad...

 
Again, duplicated that same desaturated layer and gave it a hint of gaussian blur (less than half of the first blur used for the background) and the the fill and opacity brought back up to 100%.
 
 
Now, it's starting to look good and, as you'll notice, the saturation is slowly reducing...
Next steps are "the painter's steps" where I painstakingly sit with different size brushes of black and white and multiple layers (don't get intimidated, this is optional and can be done in different easy ways). Background get first priority... Remember your selection? It should still be available (Select -> reselect), if not, select again the same way you did for the blurred bachground. Cool?
 
Right, inverse this selection so that you now have the background selected and not your subject. Paint with brush, or use the paint bucket... either, or...
Oh, then set the layer to soft light. Background's looking cool, but still a bit of work.

 
Duplicate that layer, use a (reasonable sized) feathered eraser to trim around your subject so that you get a bit of a glow and nice rich, dark bacground, just like below.
This layer will get quite a heavy gaussian blur to blend it in nicely.
 
 
Okay, now the face, this is what can take the most time.
Another layer to the onion, set to soft light (again, sigh...) and this time, very small, feathered brushes will be used. Why? Because, stop asking questions.
This is to work on the details in the face, to accentuate the creases and "character lines" in his face, to make them stand out more.
There is another way, a photocopy layer, whites removed, blurred, but it isn't as effective as being selective and means a ton more erasing... I tried that route... it can be effective, but is just so time consuming.

 
Okay, the next two steps are basically, the same... okay, they are...
New layer, painted bucket black, erase the centre with large, very large feathered eraser with opacity set to around um, 20%. Then it's case if erasing from the centre outwards. Yeah, to create a vignette.
 
 
Duplicate that layer, erase a little more to have a lesser vignette. Play with these until desired effect.
Please note: They ARE optional, but work for me.
 
 
Okay... now it's time to deal with that saturation (which you could probably see, has been changing with each layer added) by using the new adjustment layer tool... selecting saturation and adjusting the master slider. You can, however also opt for selective colour saturation by clicking on the drop down box that says, Master... I just toned down the entire colour spectrum altogether.
 
 
Finally, I added my signature and then saved it.
(okay, I might have tweaked the  brightness once more after)
 
 
That's it, as easy as that.
Do enjoy, let me know if there anything you'd like to know.
 
Okay, two more examples.
 
This one, I managed to get it better, practice...
 
 
the first one I did, this was done using the photocopy layer story I mentioned earlier.


Apr 9, 2012

Seascapes

So yes, I got myself a Sony Alpha A200 camera and had to learn to use it. I set out to finally capture some beaches, some sunsets and amongst all this other things too. I would set out at sunset, or sunrise to capture some of nature's beauty... Below is a taste of things to come from my lovely little A200.


Mar 29, 2010

HDR – An alternative process

So, HDR is the way forward for post editing images these days. It’s a great way of converting your normal image into something more… a work of art if you’d like to call it that.
What is HDR? High Dynamic Range – more can be read ->HERE<-
There are various ways of doing HDR conversion. The primary (and said to be proper) way is to take multiple images of the same scene [set at different exposures] then using software like Photomatix or Photoshop to basically merge these layers together creating a final single image that has the fullest colour range, without all the bright bits of a normal photo.
Well, I do it differently.

I use one image that I blend and alter in various layers.

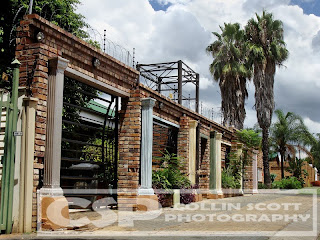
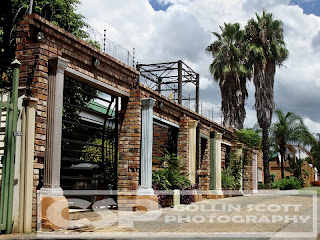
Okay, so the original, like this one below, is actually “not bad” to start with. Good light, nice colour and detail but it’s just another photograph… yawn… I started out just adjusting the colour for richness and a little more vibrancy. As usual, I got carried away and started to add more and more layers.

Collin Scott, photography, photoshop, hdr, artistic editing, sony dsc-h10, photo processing, digital photography
First port of call was to address the bright sky and darker foreground selectively, basically try to recover some of the detail in the clouds and lighten the trees and brick work. I did this in two additional layers. The first is just a light painting of black over the clouds, I set the brush opacity to around 20% and painted all the sky. It’s fine to spill over a little, that’s what the eraser is for. The second layer was to get a little light back over the foreground, darken some spots and lighten others. This is again done with black and white paint. I set this layer to soft light and painted areas like the paving and parts of the wall with black. I painted over the trees and the foreground shadows with white to lighten these up a notch or two… and then set the layer opacity to 40% (though this changes depending on image and how much I want it to reveal or blend).
Collin Scott, photography, photoshop, hdr, artistic editing, sony dsc-h10, photo processing, digital photography Woops! Now I have it looking somewhat flat! My bad… okay not really. This is deliberate, you’ll see why in a bit. I now duplicated the original image and adjusted the exposure up a tad to brighten things up again and give back some colour [opacity remains at 100%]. I set this layer to soft light as well for obvious reasons. Now it’s starting to look more like a nice image with pretty colour and detail, right? I then duplicated the original again, set it to soft light too with opacity of 12% and it made the slightest of difference but will come into play later as it merely tones the image by that 12% colour wise.

Collin Scott, photography, photoshop, hdr, artistic editing, sony dsc-h10, photo processing, digital photography Now, one of usual tricks is of course, the black & white layer (desaturation and brightness/contrast adjustments merged into layer). Soft light setting again and this time 35% opacity (yes, opacity will vary depending on how much shadow you wanting back). The problem with this layer is now the clouds become even brighter than before. No problem to my trusty eraser… be careful not to over erase though. Look! It’s really standing out now! How cool am I?

Collin Scott, photography, photoshop, hdr, artistic editing, sony dsc-h10, photo processing, digital photography

But, the sky, seriously, look at that sky!! Still too bright and clashing with the rest of the picture. New layer again and yes, you guessed it, set to soft light again (with opacity at 100). I used a heavy brush of black paint and got to painting all the light spots like the sky and all the pillars. You have to admit, it was needed, right? Okay, none of this is really needed, but I love doing it, so I will do it.

Collin Scott, photography, photoshop, hdr, artistic editing, sony dsc-h10, photo processing, digital photography

Looking good? Almost… I’m still not happy with those bright clouds. So, another [soft light] layer is added and more heavy paint work is done. This time, just to the clouds because the pillars look good to me. This has now gotten the colours and detail of the clouds to match the rest of the image quite nicely I think.

Collin Scott, photography, photoshop, hdr, artistic editing, sony dsc-h10, photo processing, digital photography But, all this work comes at a price of course… in this case, it was light, the image is now a lot darker than when I started out on this project. So I played just a little more adjusting levels and then of course playing with the selective colour feature… as always… what can I say, I like to enhance the colours to give you this pretty little picture.

Collin Scott, photography, photoshop, hdr, artistic editing, sony dsc-h10, photo processing, digital photography

So, ladies and gentlemen, another tidbit to add to your learning curve. Remember, shoot wisely, plan carefully and always, always have fun doing it.

Oh, you can also drop me a mail on cdscott76@gmail.com if you’re keen on any prints or other queries you might have.

Nov 15, 2009

Landscapes From Recent Road Trips

Recently I embarked on another couple of road trips. First was off to Mpumalanga region. Sabie, White River, Nelspruit through to Piet Retief and moolman before returning to Pretoria. Among the tall trees of Sabie, there are many roads such as this.
In between all the trees, roads and little of anything else, I spotted one of many old neglected houses...
They too had little roads leading into the forests. The guest lodge I stayed at had a pretty cool pool.
Just outside Nelspruit, the sky began to clear up. Taken amongst the hills and valleys of Mpumalanga. This Giraffe and Zebra were spotted along the side of the road, behind fencing of course on a game farm just outside Nelsruit. Up the hills and back into the contry side. Misty morning in Moolman, a tiny place not even spotted on a map, but 15 minutes from Piet Retief.
I then did Free State and Northern Cape regions. Quite different part of the world with much to see. For now I just posted some windmills spotted along the road.
Our land is as diverse as the people, if not more. You can travel 50kms and the colour of the earth itself will change constantly. This is typical Free State farm lands.
Nature's sculpturing is phenominal.